DIY Peppermint Soap – Great Gift Idea
Skip ETSY and get crafty! Make your own DIY peppermint soap in just a few simple steps! Makes a great homemade gift!
Something I have been preaching since day one of A Few Shortcuts; homemade gifts are the BEST! I always try to share new and creative crafts and DIY projects that can be turned into homemade gifts for Christmas or beyond. One thing that everyone uses and always needs more of is soap. This DIY Peppermint Soap has all the fresh smells of the holidays and is so pretty! It is also incredibly easy to make and perfect for gift giving!
What you Need to Make Peppermint Soap
You can purchase your soap making ingredients at a local craft store or online at Amazon. When it comes to crafts like this, I sometimes prefer the craft store so I can see what I am getting in person. Amazon has gotten better with their prices and selection over the years and they do have some great options too!
How to Make Peppermint Soap
Remove soap base from container and cut into pieces. Place in a microwave safe container and heat according to package directions. Once the soap is melted, work quickly as it will begin to harden immediately around the edges of the bowl.
Add 10 drops of peppermint essential oil (learn all about peppermint essential oil here)and stir to blend. If you want your soap to be two toned like mine you are going to need to color your soap! I actually melted two batches of soap base. The first I added soap colorant to reach the desired shade. Stir to blend. I then poured it into the soap mold until each segment was about half full. If the soap has begun to harden, reheat in the microwave for about 10 seconds, or melt more soap if you need to.
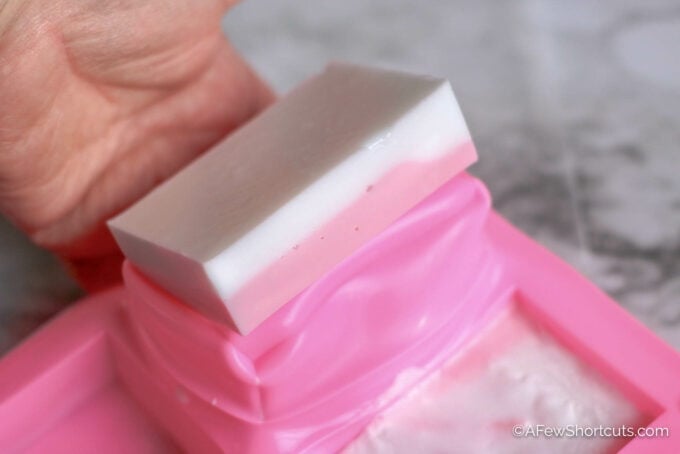
Then, I melted a second batch and left it white for the top. I still added peppermint essential oil and just poured it over the red/pink base to finish filling each segment of the mold.
Allow soap to rest for at least 45 minutes before moving. When the soap is set, remove from the mold and package for gifts. It is just that easy!
How to Wrap and store Peppermint Soap
After your bars of soap are out of your mold you can get creative. Wrap the bars of soap in parchment paper, or brown craft paper. You can tie your bars up with a pretty piece of ribbon or twine to give them as gifts. Just make sure your soap is stored in a cool dry place until ready to use.
DIY Peppermint Soap

Equipment
Ingredients
Instructions
- Remove soap base from container and cut into pieces. Place in a microwave safe container and heat according to package directions. Once the soap is melted, work quickly as it will begin to harden immediately around the edges of the bowl.
- Add 10 drops of peppermint essential oil and stir to blend. If you want your soap to be two toned like mine you are going to need to color your soap! I actually melted two batches of soap base. The first I added soap colorant to reach the desired shade. Stir to blend. I then poured it into the soap mold until each segment was about half full. If the soap has begun to harden, reheat in the microwave for about 10 seconds, or melt more soap if you need to.
- Then, I melted a second batch and left it white for the top. I still added peppermint essential oil and just poured it over the red/pink base to finish filling each segment of the mold.
- Allow soap to rest for at least 45 minutes before moving. When the soap is set, remove from the mold and package for gifts. It is just that easy!
Switch it Up
Now that you know how to make your own DIY Peppermint soap, you can switch it up; change the colors, or the essential oil used. I have even made soap with mixing like this Lavender Oatmeal Goat Milk Soap before! Making soaps is so easy and they turn out to be great homemade gifts!


